

Glue Arts hot glue gun
Glue Arts Extreme Adhesive squares
Twinery twine in Lemondrop, Cappucino, Peapod and Caribbean
Scissors
Scalloped circle punch or die
1" circle punch
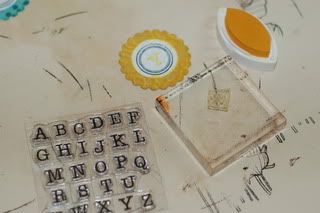
Small letter and circle stamps
Chalk inks in yellow, blue, green and brown
Paper scraps
Jars
Black ink
Instructions:
1. Attach a Glue Arts Extreme Adhesive square to the front of the jar.

2. Lay the end of the twine along the bottom of the square and start wrapping the twine around the jar. Keeping each line close to the last.

3. Wrap until the entire square is covered and trim end of twine.

4. Cut out scalloped circles with the die or punch, and punch out cardstock circles with the 1" punch. Ink the edges of all circles with the chalk ink.

5. Attach the cardstock circles to the scalloped circles using Glue Arts Extreme Adhesive squares.
6. Use the black ink to stamp a circle design onto each cardstock circle.

7. Use the chalk inks to stamp a letter or message onto the carstock circles, inside the black design.
8. Use the Glue Arts Hot Glue Gun to attach the labels to the jars

Thanks for stopping by! These are also up on the Glue Arts blog today, along with a few chances to win some great prizes. Be sure to go check it out!
2 comments:
Okay Mrs. OCD, why does your jar labeled brown have white buttons in it? Where did you get those jars, they are so cute!
I was hoping that no one would notice that. I realized that I did it once I took the pictures. I matched the stamp to the twine and paper and didn't even think about the dots so it's a "B" and not a "C"
I have had those for a long time, but I think you can still get them at Cost Plus
Post a Comment