Showing posts with label Xyron. Show all posts

Wednesday, August 10, 2011

I do other things besides challenge layouts :)

See?  I do cards for DT work too! :D 


I used the Many Thanks set by gel-a-tins to stamp the ribbon with the leaves and also used it for the greeting.  I layered and attached all that ribbon with my Xyron 150 (love it for that).  I used my Xyron 510 to attach that canvas to the card blank too.  Any other way I would have tried would have been a mess for sure!

Remember the Sassy Lil' Sketches e-book I mentioned?  I got some more details!  It'll be out by the 15th of August and the cost will be $8.99.  That's a great deal for a book of about 70 sketches that's also filled with samples!

Tuesday, July 19, 2011

My second gel-a-tin stamps project!

Woot!  I am having so much fun playing with these stamps!  The detail you get is really amazing.  I also used some scented embossing powder tonight and it is so cool!  The color is silver and it's called Storm.  It's a masculine scent and I like it a lot.  These aren't like scratch and sniff scents, think more like a yummy candle.  They smell great!  Anyway, check out my project!

I used some frames I was given to make these cute little shadow box style decorations for my house. I can set them on a table or hang them on the wall. Can't wait to use them! That Halloween banner that comes in the Witchy Poo set might just be my new favorite stamp.


Supplies Used:
Witchy Poo stamp set and Storm scented embossing powder by gel-a-tins
Cardstock by Coredinations
Texture rollers by Xyron and texture folder by Provo Craft
Versamark and Staz-On inks
Twinery twine, Daisy D's stickers, Martha Stewart accents
Xyron adhesives and a hot Glue Gun

Thursday, June 9, 2011

Quick altered gift bags

Today I thought I'd share some gift bags that I altered for Xyron.  I seem to have a birthday party to go to almost every week this summer.  These bags were very affordable at Target (they were 99 cents to $2-3).  They come in a great kraft color and the ribbon handles were included.  You could easily use your scraps to make these bags for any occasion.


The dies are all by Spellbinders for the Xyron Creatopia.  I really love that flower on the pink bag.  I see lots of those in my future :)  


Tuesday, April 12, 2011

I give up!

On getting a good picture of this project :)  Sorry.  I've been stressing about it for a week, and it just isn't a great picture, but I hope you'll still appreciate that it's a cute project!

Silhouettes are a tad popular right now, and I thought about this one night and decided that I'd do this project to add a little something to my Easter decor.  I like how they turned out, but I did manage to buy two out of three frames with no built in stand and I have to do something about that.  What a dork!


I searched the web for pictures that I could trace in my Create and Cut software.  Cut the chicks out in two different sizes and flipped one.  I used mostly scraps of paper for everything else.  Clouds were cut freehand and all the inking was done with a sponge for an antique sort of effect.  I hot-glued the goodies to the outside of the frames because I like that look.  I also chose three different frame styles to make it have that eclectic look.  (They are all white, not that you can tell from this awful picture).

Anyway, thanks for looking!  I hope you're having a good time getting your house ready for spring!

Monday, April 4, 2011

Family Quote Frame

A couple of weeks ago I was asked to make this project for Xyron to use in Michael's.  It'll be on a tear off sheet in the aisle with the Creatopia once they're in stores (at least I think so :) ).  I don't have instructions to share right now, because they will be in stores, but I thought I'd share it so you can at least see the project.  I was pretty happy with how it turned out!


The supplies were all purchased at Michael's, and the dies that I used are the new Spellbinder's dies for Xyron.  They're really pretty!
Thanks for stopping by!

Tuesday, March 29, 2011

HSN fabric projects!

I was asked to work with some fabric by Riley Blake Designs and the Xyron Creatopia to make projects for HSN.  The fabric is adorable and I had a lot of fun working with it!
Here's what I made:


I made this first because I had to make something for a boy!  Everyone makes projects and clothes for girls and there's so little out there for boys.  It's a real bummer when you have four sons and no daughters :)  I like to have cute stuff for my kids too!  I drew the tie myself and cut it out, then added the Xyron Fabric Adhesive to it so it was like a big sticker.  Once I had it where it needed to be I just did a quick zigzag stitch around the edge.


To go along with that, I made a little girl's t-shirt into a dress.  My ruffler foot came in pretty handy on that skirt :)  I got to use my Xyron Fabric Adhesive on the flower applique and on the ribbon that I added.  It makes it so easy!  I didn't hem the skirt, I just serged the edge.  I like that it looks a little rough.


The last project I made was this little wall hanging/doll quilt.  I used the fabric adhesive for the hearts that I appliqued onto the white squares.  And those hearts?  Cut them out using a Spellbinders Die made for Xyron.  It's really cute in person :)

Be sure to keep an eye out for the Xyron Creatopia on HSN tomorrow and let me know if you see any of my stuff!

Friday, March 11, 2011

Xyron Friends Friday!

Who doesn't like winning great stuff?  Head over to the Xyron Facebook page and leave a comment on their Friends Friday post for a chance to win some awesome Xyron machines!


Here's what they have to say:

Friends Friday: We would like to add some new Facebook Friends during Craft Month. Help us and post first names of your friends that might be interested in Xyron products and tell them to "LIKE" us. We will "GIVE AWAY" Blue machines.. 1.5", 2.5" and 5" create-a-stickers, Magic Sticker Maker, and a Every Day Stories Album to 5 random posts below on Mon. Start sharing the link. Have a great weekend and good luck.


So, suggest the Xyron page to your friends and become a fan too!  Good luck!

Brotherly Love


Another layout for you today!  This was based on a recipe challenge over at Scrap Chicks.  I used another old Studio Calico kit along with some other bits and pieces.  I can't believe how big Tucker is now compared to the chubby little guy he was in this picture!

Thursday, March 10, 2011

Mr. Magoo


This is one of my new favorites. I used stuff from one of my old Studio Calico kits and a challenge from Scrap Chicks.  We had to interview someone and I just used the questions that the DT member, Kari used when she interviewed her daughter.  I love the blues and yellows together!
Thanks for stopping by!

Friday, March 4, 2011

Canvas Corp. Burlap

A little while ago Canvas Corp. sent me a cute box full of goodies for me to use with my Xyron adhesives.  Now, I was asked to make up a layout based on a sketch for Scrap Chicks and I thought that their black and white patterned paper and burlap sheet would be perfect!  Here is what I came up with...


I had these pictures of my mom reading to the boys and my nephew up at the cabin and thought that they'd look great for this sketch and with the Canvas Corp. stuff. 
Thanks for checking it out!

Thursday, March 3, 2011

More layouts

I've been working on challenges and sketches the for the last two days, so I thought I'd share some more of them with you!  These are both based on sketches from Scrap Chicks.


These were both made with Imaginisce papers and embellishments, and my Xyron adhesives.  The new mega runner is awesome!  This line has the cutest embellishments that go with it, and I love their little stamps.  It's a good thing that I have so many more birthday pictures to scrap :)

Sunday, February 13, 2011

Another quick Valentine's Day craft!


I've had this Bare Essentials heart for a while and I knew that it would be perfect for a little Valentine's Day decor.
I covered it in some BoBunny paper that I ran through my Xyron Creatopia and added the few embellishments from my stash.  I punched a hole in that little old Queen and Co. heart and tied it to the wire and done! 


It's nice to have more than three things out to decorate with this year :)

Thursday, February 10, 2011

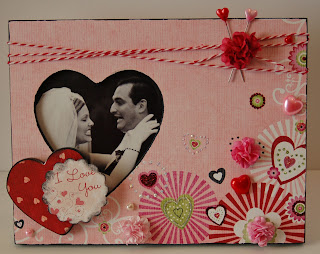
Lovey Dovey Frame

I picked this up last month at Michael's.  The frame was about a buck and I think the little wooden heart was about half that.  Pretty affordable when you throw in paper from BoBunny that I got from Xyron last year and embellishments that I already had or made from things I already had.  I think this is my favorite project of the things I made today.

 I added a little extra bling to the details on the paper with some Stickles.  The flowers are more that I made out of those old, little bitty Primas I still have a bunch of jars of :)


Like that picture?  I think it captures our marriage pretty well.

Wednesday, February 9, 2011

Valentine's/Birthday Treats!

My littlest guy, Tucker, turns four on February 15th.  He doesn't have school that day, so I'm sending treats on Monday.  They've got a Valentine's theme, but they're extra cute and have more stuff in them that I would normally send for Valentine's Day. 


I already had these little tins from back in the day when I used to teach scrappy classes more often.  There are only eleven kids in his class so I have no problem doing something that's a little more involved and expensive for him.  Now, I don't mean to act like I went out and spent a bunch of money on all the stuff that wasn't already in my scrap room.  I bought the paper and die cuts at Target in the dollar spot.  The ribbon, stamps, ink and punches I already had.  I ran the paper and die cut wraps through the Xyron Creatopia to attach them to the tins.
The goodies I put inside were just inexpensive little things from the Target Valentine section.  Tucker is pretty excited to share, and even though I still have more work to do (I have to bake treats!), I'm excited for his first birthday that he'll get to celebrate with his new school friends.

Monday, February 7, 2011

First Valentine's project of the month!


I had so much fun designing and making this that I wanted to be sure to share it with you all.  I love my Wishblade for projects, but I am no expert.  The more I play, the more comfortable I am and the better my projects are.  I really do a lot of things with text when I'm using this cutter, and having all those free fonts available on the internet really helped me out!


 I went into the Create and Cut software that comes with the Wishblade and started typing out the word "Love" over and over in just about every font.  Then I started arranging them in a shape that would fit inside my mat.  I resized some of the words as I went along and turned them in different directions.  I cut it out of vinyl (which is pretty easy to find at just about any craft store these days).  I'll explain why in a minute.

 This is the close up of it after  I've peeled the letters out.  Some of those are pretty delicate cuts and because I used the vinyl I just had to pop the letters out instead of worrying about how I was going to get the paper peeled off the cutting mat, know what I mean?  Pretty sure that I would have had some tearing that way.

 I just put it in a cheapo frame and mat that I bought.  Got the mat a while back at Michael's for about $3 and the frame was $7.50 at  JoAnne's.  Not too shabby if you ask me :)


I made the fuller flowers out of some old Primas and hot glued the thicker embellishments right onto the glass.  The little sequins go right through my Xyron 150. 

I hope you like this one because it's one of my favorite projects right now.  I have very little stuff to use for Valentine's decor and this looks pretty cute in my front hallway.

Wednesday, January 26, 2011

Grab Bag!

While cleaning my crap room, I found this pattern that I'd printed out a while ago.  I have a lot of printed out patterns and instructions for making mini albums and projects like that but I keep most of them together in a binder so I can grab the whole thing and look through it.
The pattern is from All People Quilt and I obviously thought it was cute when I found it the first time. :)  It's a pretty quick and easy bag to put together and I think it's neat that it gets held a little differently than your average bag.

 I found this fabric for the outside as a remnant at Hobby Lobby and it was only a little over $3.  I already had the black fabric for the lining and used a little leftover quilt batting for the padding so it was a pretty cheap bag!  I also had the flower already (got that at Hobby Lobby too) and thought it made a cute addition to the bag.

This is what it looks like when it's open and plain.  The long handle slips through the short handle and you carry it by the loop that sticks through.  It has six little pockets on the inside too. 

I actually made this bag to take with me this weekend.  I'm actually going out of town...to CHA!!  WOOHOO!  I am so excited that I get to go to the show.  I'll be doing make and takes in the Xyron booth and helping in the Xyron classes, but I'll have a break every day to go look around and drool on everything.  I'm taking my camera, but not my computer so you'll have to wait until Tuesday to see the pictures because I don't come back until late Monday night.  I'm leaving Friday morning and I'm totally geeking out about it.  If there's a booth or product you want to see, let me know!  I'll try to do some pictures and videos from my phone as well and they'll upload to my regular Facebook profile. 

Have a great weekend everyone!

Tuesday, December 28, 2010

A quick way to add some cute to your party

I had this idea in November.  Bought the stuff to make everything.  And then...yeah.  Sometimes getting cute pictures taken really holds me back.  These would really be fun for any party, holiday, birthday, tea, etc. 
I love cake plates and when I saw these mini candlesticks at Hobby Lobby I thought they looked like a cake plate base.  I had a little trouble finding a ready made top, but you can see that I worked that out for one of them and made my own for the others.  Have a look!
This is the base with a few layered chipboard circles on top.  I cut them out and stuck them together with my Xyron Creatopia and adhesive.  They won't be coming apart any time soon and they're smooth and sturdy.  I used hot glue to attach the top, then painted the whole thing white.  Once they were dry I added the ribbon with hot glue as well.

Another simple one that I made the same way.  This one just has silver ribbon because you all know I love me some sparkle.

For this one I punched out some white paper with a Martha Stewart punch and added that with some hot glue.  This one really looks like an old fashioned cake plate and I love it.
 Speaking of sparkle, there's this :)  I bought these mirrors at Hobby Lobby as well.  The little teardrops are mini glitter ornaments from the same place.  For the glitter on the base I gave it a coat of Martha Stewart's glue (comes in a nice sized bottle with a brush built in to the lid and it's awesome) and then I sprinkled it with Vintage Glass Glitter from Art Glitter.  Definitely nice for a fancy dessert.

I hope you like these!  I had a lot of fun making them and once I decide which one I like best I'll be sure to make a bunch up for my next party.

Monday, November 15, 2010

Holiday OCD

Those of you that know me well are aware of my craziness when it comes to party planning.  I work on menus, guest lists and favors months ahead of time.  I make lists, scour magazines and the internet for recipes and tear ideas out of the paper.  When one of the girls at ScrapFreak posted a holiday journal project I knew it would be the best thing for me to make!  This was so quick and easy to put together and I've been filling it with lists since I finished gluing everything down :)
I bought a little album at Hobby Lobby on clearance for a little over $2.  I took the binding rings out so I could cover it completely with the paper (which is gorgeous doily paper by Hambly).  I used my Xyron to attach the paper to the covers because I know that no matter how much this thing gets used and taken in and out of my purse, the paper won't be going anywhere.  The tabs that I added to the pages were just little circle die cuts that I made with my Spellbinders scalloped circle dies.  I ran them through my Xyron, and folded them in half over certain pages to make the tabs.
Some embellishments, ribbon and silver mist spray finished it off.

Wednesday, November 10, 2010

I'm back and I have a quick Thanksgiving craft for you...

My trip to Houston with Xyron was so much fun!  It flew by and I was totally pooped when I got home, but it was really great.  I have a few pictures of the booth (and my projects!) but first I'd like to share this quick, fun and (almost) free craft.  I did have to buy a frame, but if you've got something laying around that you can use, this is one very inexpensive project.


The picture can be found for free here.  I thought it was really cute so I printed it out at home on some cardstock.  Yesterday I grabbed a matted frame at Marshalls and added a few embellishments to fancy it up a little.  Voila!  I have it sitting on a table in my front hall and I'll be bringing it out every year.

I only got a few pics in Houston, but I thought I'd share.  When I went to take my camera out on the first day my batteries were dead!  I didn't get any pics from dinner the first night, or of my nice hotel room or anything. 
The booth was pretty nice.  I liked all the color and there were cupboards and things for storage that were very handy.  Nothing like not knowing where to put your purse, right?  I had my luggage on me the whole time so it was especially nice to have somewhere to put it.
No pictures of me either!  I'll have to see if I can get the one from the other person that took pics :)


Look at all that fun stuff!

I recognize that wreath!

There were women at this super fancy quilt show checking out my quilt!  How cool is that?
I did do a little shopping (which kind of defeats the purpose of working at the show, but that's okay.  Some of it was for Christmas gifts.  They'll be another project that I'll share as I finish them.

Saturday, October 30, 2010

My latest quilt!

A friend sent me a blog link to this pattern and I immediately knew that I wanted to make it and that it would be great to use the Xyron fabric adhesive to hold those circles in place while I sewed them down. First, go check out this great blog with all the patterns and ideas! 


I have got to make a cover for my camera strap and I think her tutorial will be great for that.
Now, check out my quilt....

This was much easier to make than I thought it might be.  I was afraid that cutting everything out and matching up the pieces once I cut up the blocks would take forever, but I got the whole top done in a day.  I love that it frays a little after you wash it too.